SURGICAL PROCEDURE
I
Excision
a. Surgical application of NEVELIA® Bi-Layer Matrix
The surgeon must make sure that the matrix is intact and clean before use and that a second matrix is available in the event that the first one is damaged or contaminated during its handling. Never use damaged or contaminated products.
In patients receiving NEVELIA® Bi-Layer Matrix after burns, the extent of the burns should be assessed and the zones requiring immediate excision and grafts identified. The procedure can be scheduled as soon as the patient’s condition has stabilized and is therefore left up to the discretion of the surgeon.
Patients undergoing reconstructive surgery should be given an appropriate pre-operative assessment.
b. Preoperative guidelines
The preoperative routines are specific for each center but should follow:
- normal surgical protocols
- control of contamination may include the use of topical agents such as silver impregnated dressings
- Preparation of wound bed may include the use of povidone iodine or chlorhexidine gluconate
- Negative Pressure Therapy (NPT)
.
c. Operating room supplies
In addition to standard OR supplies, the following supplies should be available in the OR:
- Excisional devices (i.e., scalpel, Versajet™ Hydrosurgery system, Curettes, Dermabrader…)
- Extra electrocautery instrumentation (e.g., bovie, double plug, bipolar) for pin-point coagulation
- Antimicrobial agents/dressings
- Compression dressings/wraps /Negative Pressure Therapy (NPT)
d. Wound excision
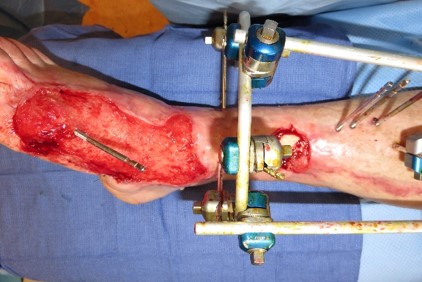
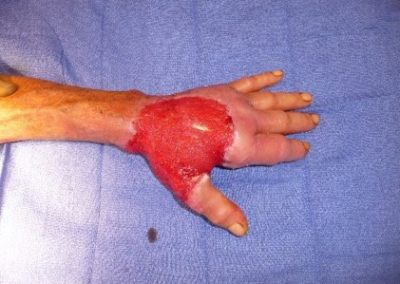
Examples of good vascularized tissues
Before and after wound bed preparation
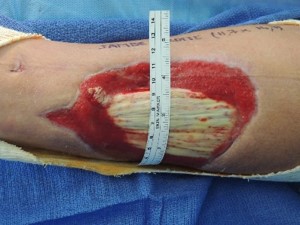
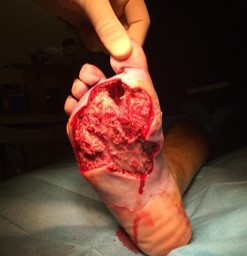
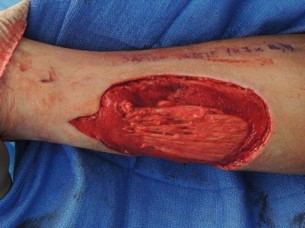
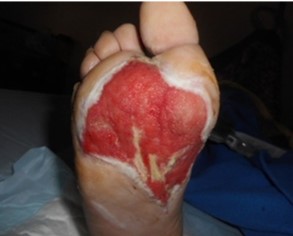
Wound detersion and NPT use
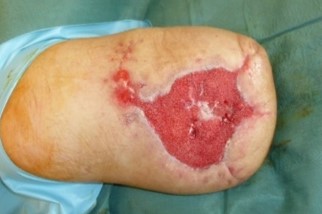
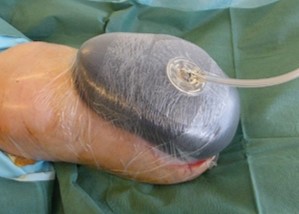
Nice wound bed ready for NEVELIA® procedure
II
Application
a. Product preparation
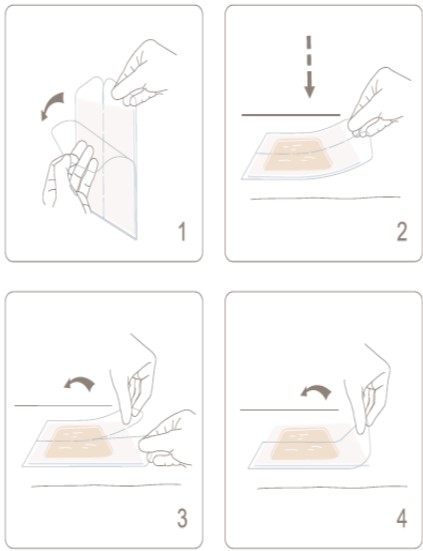
The NEVELIA® Bi-Layer Matrix is packaged between two rigid plastic sheets, each of which has a gripping tab. Handle the product using these grip tabs.
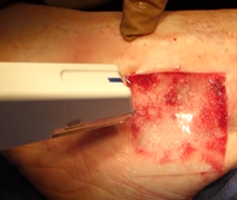
- Holding the split grip tab on the protective plastic sheet covering the silicone side of the matrix, detach the protective sheet from the collagen layer without touching the collagen matrix. The silicone layer will remain stuck to the protective film (picture 1).
- Holding the product by the grip tab on the remaining protective sheet, position the matrix on the wound, collagen side down. Thanks to the cohesion between the silicon layer and the plastic protective sheet, the position of the matrix can be adjusted, continuing to hold it by the protective sheet without touching the collagen (picture 2).
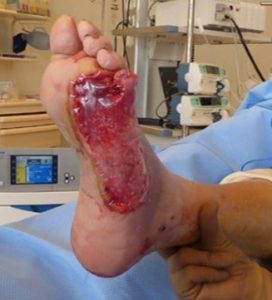
- When the matrix is correctly in place, remove the plastic protective sheet from the silicone layer by dividing it in two along the split (picture 3, picture 4).
- Shaping
b. Nevelia® Bi-Layer Matrix positioning : precautions

NEVELIA® Bi-Layer Matrix must be cut to fit the excised wound exactly. This will minimize scarring. It is important to ensure that the matrix is inserted into the wound with the collagen layer directly against the viable wound bed, and the silicone layer facing outwards.
When it is used in mobile areas, NEVELIA® Bi-Layer Matrix must be implanted in such a way as to prevent its mechanical dislodgement.( i.e dressing with NPT)
The matrix can be meshed if used for highly exudative wounds or to improve the fit of the bi-layer matrix to an irregular surface. NEVELIA® Bi-Layer Matrix must not be expanded.
c. Shaping Nevelia® Bi-Layer Matrix to the wound bed
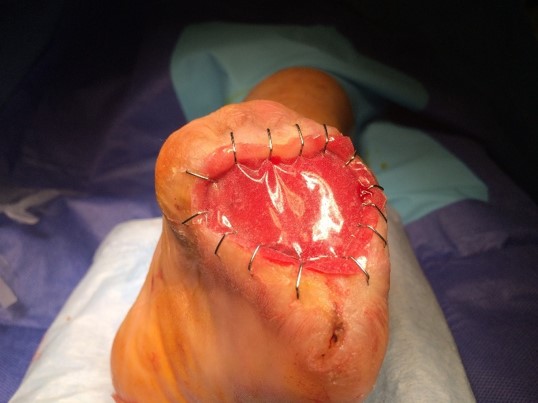
Carefully remove any air bubbles by pushing them gently towards the edges. Then, using sterile scissors, cut NEVELIA® Bi-Layer Matrix precisely to allow an airtight edge-to-edge join between the healthy skin and the matrix and reduce the risk of bacterial infection.
Any unused portions of the matrix must be disposed of in compliance with current legislation for biohazards.
d. Fixing Nevelia® Bi-layer Matrix in place
It is not recommanded to overlap Nevelia® on the sain skin.
- parallel to inside edge of wound bed and then remove excess of matrix
- perpendicularly across the seam after removing the excess of matrix
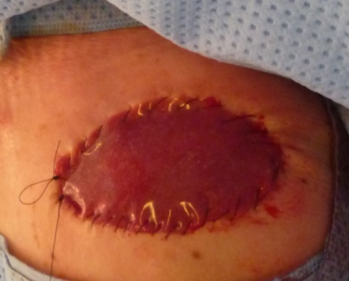
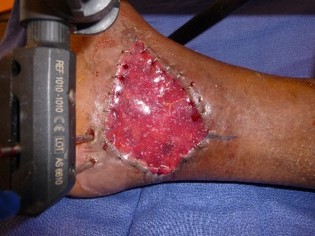
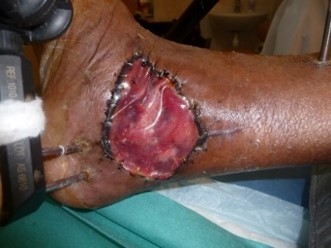
The strength of the silicone layer makes it possible to use intradermic running sutures in the healthy skin. This prevents peripheral scarring. In mobile areas, a sterile compress may be rolled up and applied on the graft area and held in place with sutures. Once in place, a dressing must be placed over the matrix to ensure that collagen layer underneath remains directly in contact with the viable tissues. This dressing must prevent the matrix from dislodging to promote dermal regeneration. The surgeon may or may not decide to use a negative pressure dressing. When such dressings are used, the pressure applied must be low to prevent crushing the matrix.
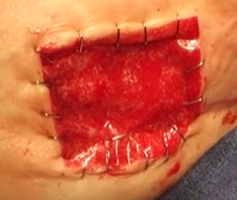
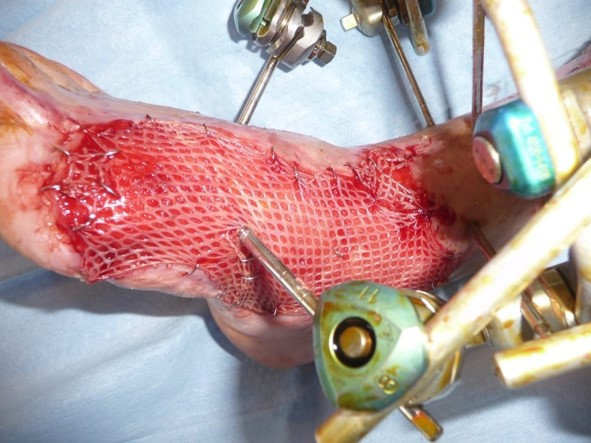
Secured with surgical staples
- either perpendicularly across the seam (on the picture)
- or parallel to inside edge of wound bed
- Eventually in the middle of the matrix to improve interface contact
Secured with sutures
III
Post Op Care
a. Nevelia® after care
Checking for complications or adverse events: Follow the protocol applied after an autograft or treatment with another skin substitute (ensure that no hematoma, fluid build-up or infection is present).
The staples or sutures must remain in place until the thin split thickness skin graft takes place (about 3 weeks ). They help to hold the matrix in place and reduce the risk of its detachment from the wound bed and separation of the silicone layer during the reconstruction.
Lateral forces may lead to displacement of the NEVELIA® Bi-Layer Matrix on the wound bed and are to be avoided wherever possible.
Dressing changes: The outer dressings must be changed regularly to monitor the state of the wound.
Hydrotherapeutic immersion: Hydrotherapeutic immersion of the patient should be avoided as it may prevent proper integration of the NEVELIA® Bi-Layer Matrix or cause early separation of the silicone layer.
Patient mobility : All inadvertent movement-related disturbance of the NEVELIA® Bi-Layer Matrix should be avoided as this may cause it to separate from the wound bed. Physiotherapy and joint mobility exercises are possible as soon as the patient is well enough, and with the physician’s approval.
Outpatient treatment patients undergoing reconstructive surgery who are discharged home or transferred to another healthcare facility pending the thin split thickness skin graft should be monitored by their attending physician. All the necessary precautions must be taken to protect the NEVELIA® Bi-Layer Matrix from mechanical displacement and/or contamination.
b. Dressing
The dressing is specific for each center and depends on the available products. But the main point is to obtain a close contact between the bi-layer matrix and the wound bed.
Example of dressing Protocol : The dressing carried out in the operating room is a dressing combining betadine cream on the periphery of the NEVELIA® (to isolate) and a greasy tulle, then dry compress on the top and band with a moderate compression to ensure close contact of the bi-layer matrix to the wound. The first dressing is made 3 to 4 days after its placement and then the following dressings are made every 2 to 3 days following the evolution. The first dressing is carried out in a hospital setting with rigorous asepsis to avoid any infection of the collagen matrix . A sterile field will be set up for the dressing. The removal of the last compresses and tulles will be done with sterile gloves. In case of allergy to the iodized product, the dressings will be made as described above but with saline, Antibiotulle leaves and dry compresses.
Nevelia® dressing procedure
J0
1/ Iodine ointment on the staple line
2/ Iodine gauze on the silicone sheet
3/ Dry gauze
4/ Compressive bandage
c. Adverse events and complications
The patient must be informed of the risks, possible adverse reactions and complications related to the procedure and the use of this product. Patients with severe burns, may experience the following complications: death, septicemia, cardiac arrest, renal insufficiency, generalized organ failure and respiratory distress. These complications are not related to the use of NEVELIA® Bi-Layer Matrix but to the patient’s initial condition. Unexpected inter- and post-operative complications may occur with any surgical procedure. It is the surgeon’s duty to inform the patient of this before surgery. The adverse events most commonly reported with this type of procedure are the following :
Wound infection
Day 1
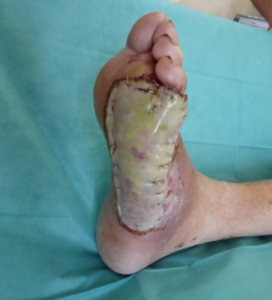
Day 3
Local infection, an injection of betadinated physiological saline or other antiseptic solution should be performed with a small syringe of 10 to 20 ml and a flexible catheter of large diameter.
This soft and progressive washing is carried out from the edge in between the staples under the substitute or under the silicone sheet.
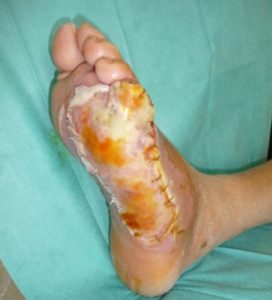
Day 14
Hematoma
Hematomas may develop even when hemostasis is complete before NEVELIA® Bi-Layer Matrix is implanted on the wound.
- If the hematoma is recent and of limited dimensions, NEVELIA® Bi-Layer Matrix can be pierced to release the blood.
- If the hematoma is still in fluid state: the evacuation can be done by aspiration with a needle and syringe under the surface of NEVELIA®.
- If the hematoma is no longer fluid it must be removed by incision of NEVELIA® with a sterile blade,
- In all other cases, remove NEVELIA® Bi-Layer Matrix and control the bleeding. Apply a new NEVELIA® Bi-Layer Matrix.
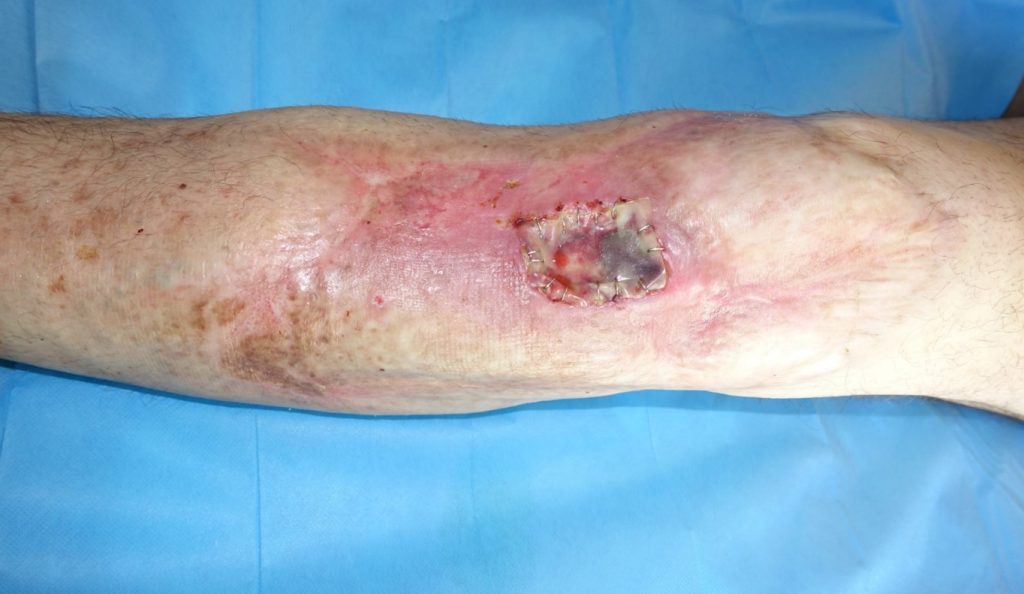
Hematoma : evolution in the proximal part
It will be evacuated at dressing time according to the technics described previously
Collection of fluid under the matrix (seroma)
Between the 1st and 7th days, serous fluid may build up under the collagen matrix and compromise the formation of the neodermis by separating the matrix from the wound bed. In such cases, pierce the matrix and aspirate the fluid with a needle and syringe or by rolling or wicking.
Early detachment of the matrix
Matrix detachment indicates that no neodermis has formed. If no dermis forms over part or the entire wound and if no complications such as hematoma, seroma or infection are present, then remove the matrix from the area concerned. Inspect the wound bed and remove any nonviable tissues present before implanting a new matrix. This adverse events is rarely present with NEVELIA®, it could occur when the wound bed is not well prepared (not enough vascularized, or necrotic tissue remaining).
Early separation of the silicone layer
If the silicone layer separates and the exposed dermis appears mature, then proceed with the thin split thickness skin graft. If the exposed dermis is not mature, wherever possible re-cover the wound with the same silicone layer pending maturation by reattaching the silicone sheeting. If it is not possible to re-use the same silicone layer, a fresh matrix must be applied.
The wound must not be left exposed without the silicone layer as this could encourage the development of granular tissue and wound contraction. This adverse events is rarely present with NEVELIA® as the silicone is reinforced. It can remain in place for a long time even after the maturation of the dermis underneath.
d. Neodermis formation
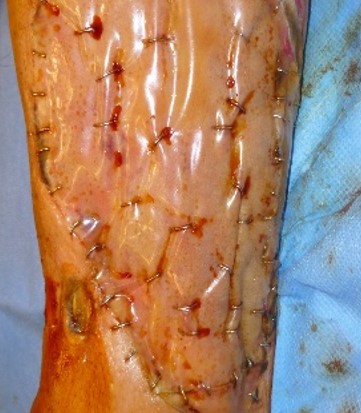
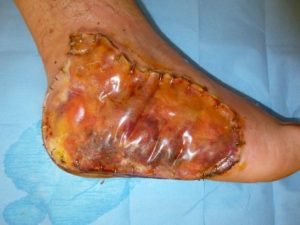
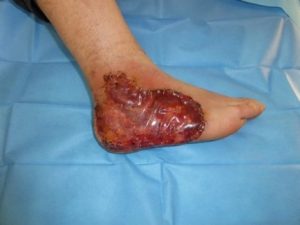
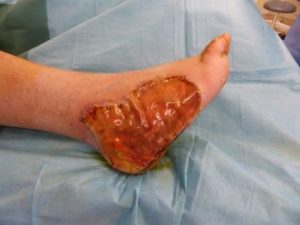
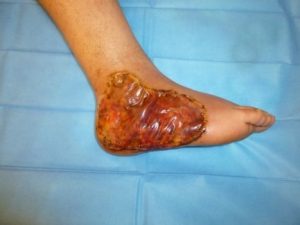
The neodermis reconstruction begins from the matrix implantation and will be adequate for STSG between 14 to 28 days depending on the grafted area, the patient conditions and rate of healing etc…
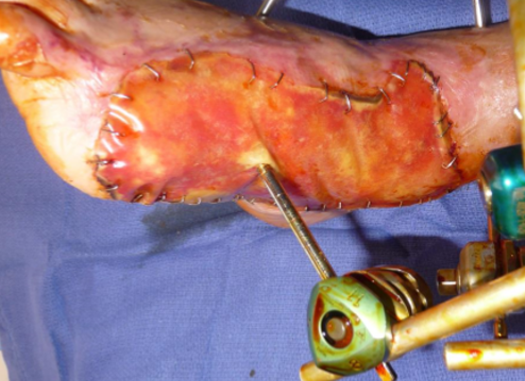
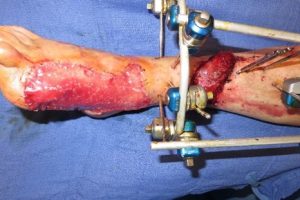
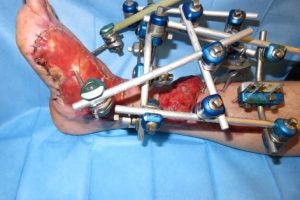
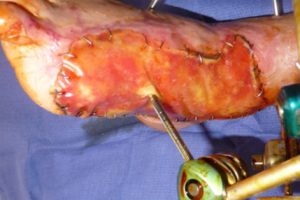
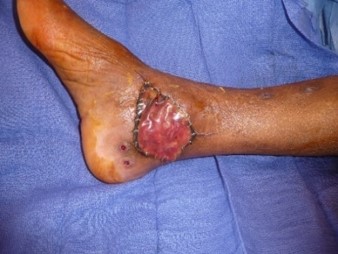
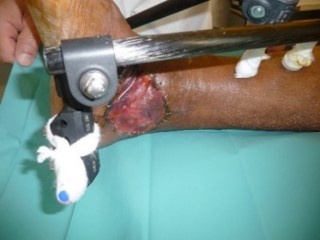
The color of the matrix will change with the maturation of the dermis underneath from the red (D0) to orange / vanilla (total maturation). The matrix must be inspected for darkened areas or white/gray areas which may result from complications (see Complications). The maturation of the neodermis allows the separation of the silicone sheeting easily which is also an indicator of a good reconstruction.
The silicone removal is generally performed around 21 days post graft but this can be extended if the silicone layer remains attached on the edge even it is detached from the neodermis. It could be useful in case of non availability of skin donor site.
Colorimetric indications of the vascularization degree
DAY 21
after NEVELIA® placement :
The change of color to orange-peach indicates the good time for Split-Thickness Skin Graft (STSG).
Some examples of colorimetric stages
J0
J14
J18
J0
J18
J11
J14
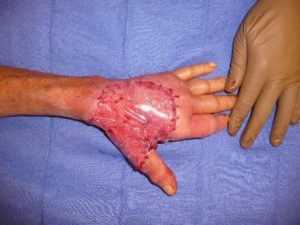
J0
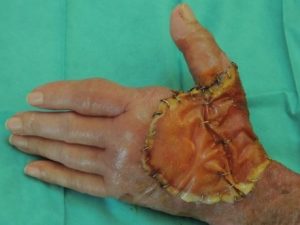
J12
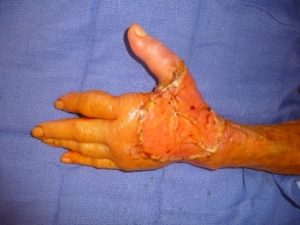
J22
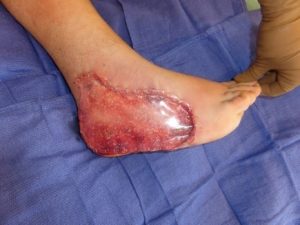
J0
J22
J8
J29
J14
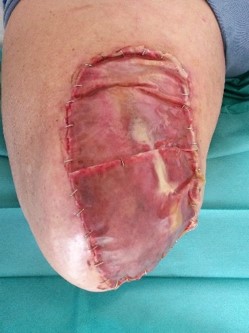
J0
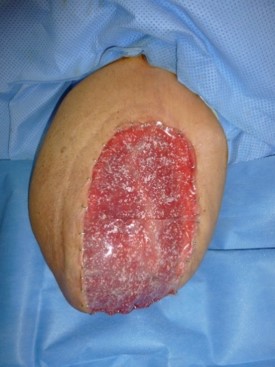
J21
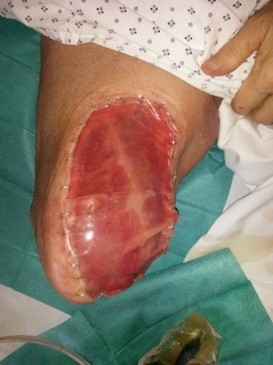
J4
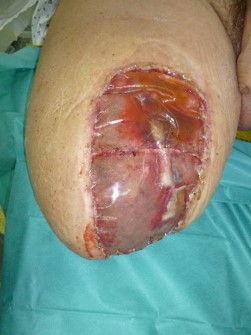
J26
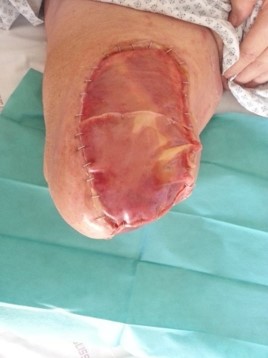
J8
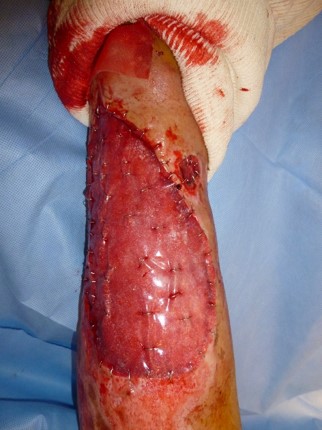
J0
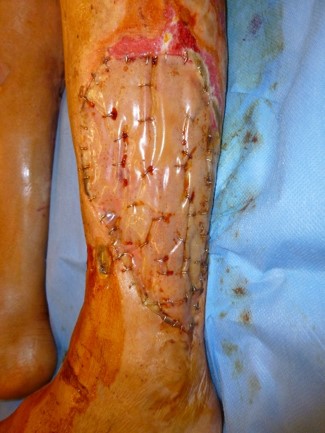
J26
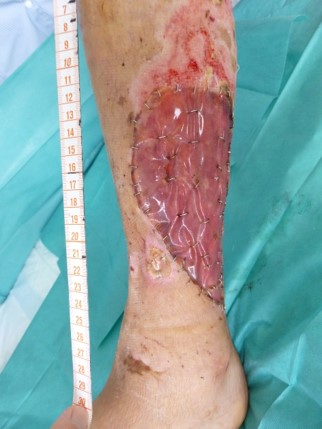
J8
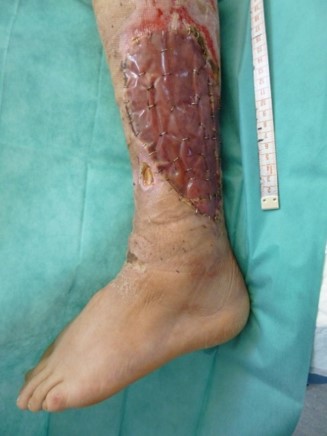
J12
IV
Epidermal Grafting
a. Decision for Split-Thickness Skin Graft (STSG)
Once the NEVELIA® Bi-Layer Matrix has been applied, the neodermis has formed and the silicone layer has been removed, STSG should be performed using skin with similar color and texture characteristics. The donor site will present punctate bleeding. The STSG can only be done once the surgeon has assessed the quality of the neodermis. The assessment is based on the color of the wound observed through the transparent silicone layer and the detachment ability of the silicone layer from the wound. The reconstructed dermis has a distinctive orange-yellow or light yellow color and may present with slightly reddish areas. The neodermis must adhere to the underlying tissues.
The silicone layer must separate from the underlying dermis easily and should only be removed when the latter has replaced the collagen matrix (about 21 days after the application of the NEVELIA® Bi-Layer Matrix). Care must be taken not to accidentally remove the newly formed dermal tissues when removing the silicone layer. The reconstructed dermis must not be excised. The split-thickness skin graft can be done immediately after the neodermis has formed. The silicone layer must always be left in place until the split-thickness skin graft is performed, the silicone layer must not be removed if the STSG is not available. The silicone layer removed should be disposed of in compliance with current biohazard legislation. The split-thickness skin graft must be monitored to ensure that it takes, since some cases of detachment have been reported in the literature.
b. Silicone removal
The silicone layer must separate from the underlying dermis easily and should only be removed when the latter has replaced the collagen matrix, about 21 days after the application of the NEVELIA® Bi-Layer Matrix.
c. Silicone layer difficult to remove
The silicone layer should be easy to remove from the neodermis. Any difficulty removing it may be an indication that the neodermis has not yet formed. Forceps and a scalpel may be used to carefully and gently separate the silicone layer from the neodermis without damaging the newly formed tissues. The silicone layer could be left in place longer if the neodermis is not satisfactory or if the STSG is not available, even if the silicone layer is detached in the middle but still attached in the edges. For small area, the epidermisation from the wound edges can be obtained under the silicone without STSG, by letting the silicone layer in place .
d. Harvesting the STSG
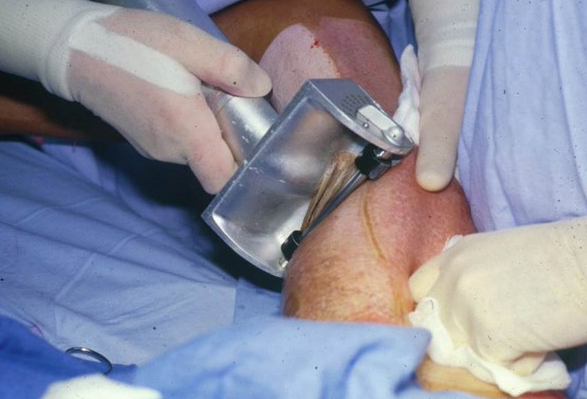
Harvesting the STSG
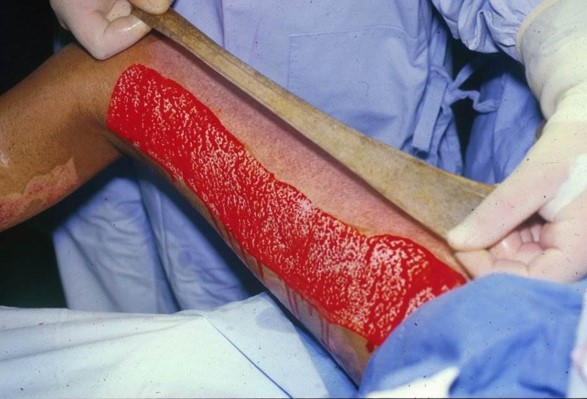
STSG harvested
e. Attaching the STSG
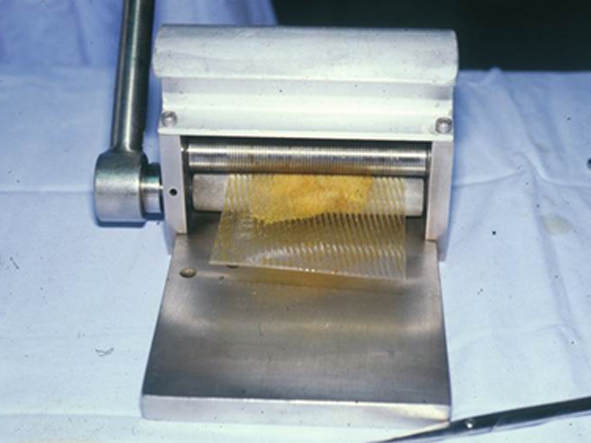
Mesh graft
Expansed and grafted STSG
f. STSG post op care
After the second surgical time corresponding to the STSG, the dressings will be realized as for any dermo-epidermal graft.
STSG result
